LinkedIn automation can save you time and help you connect with more qualified leads. By using tools like Closely, you can streamline tasks like sending connection requests, following up with messages, and managing responses – all while maintaining account safety. In just seven days, you can set up a system that runs 24/7 and generates leads efficiently. Here’s a quick breakdown:
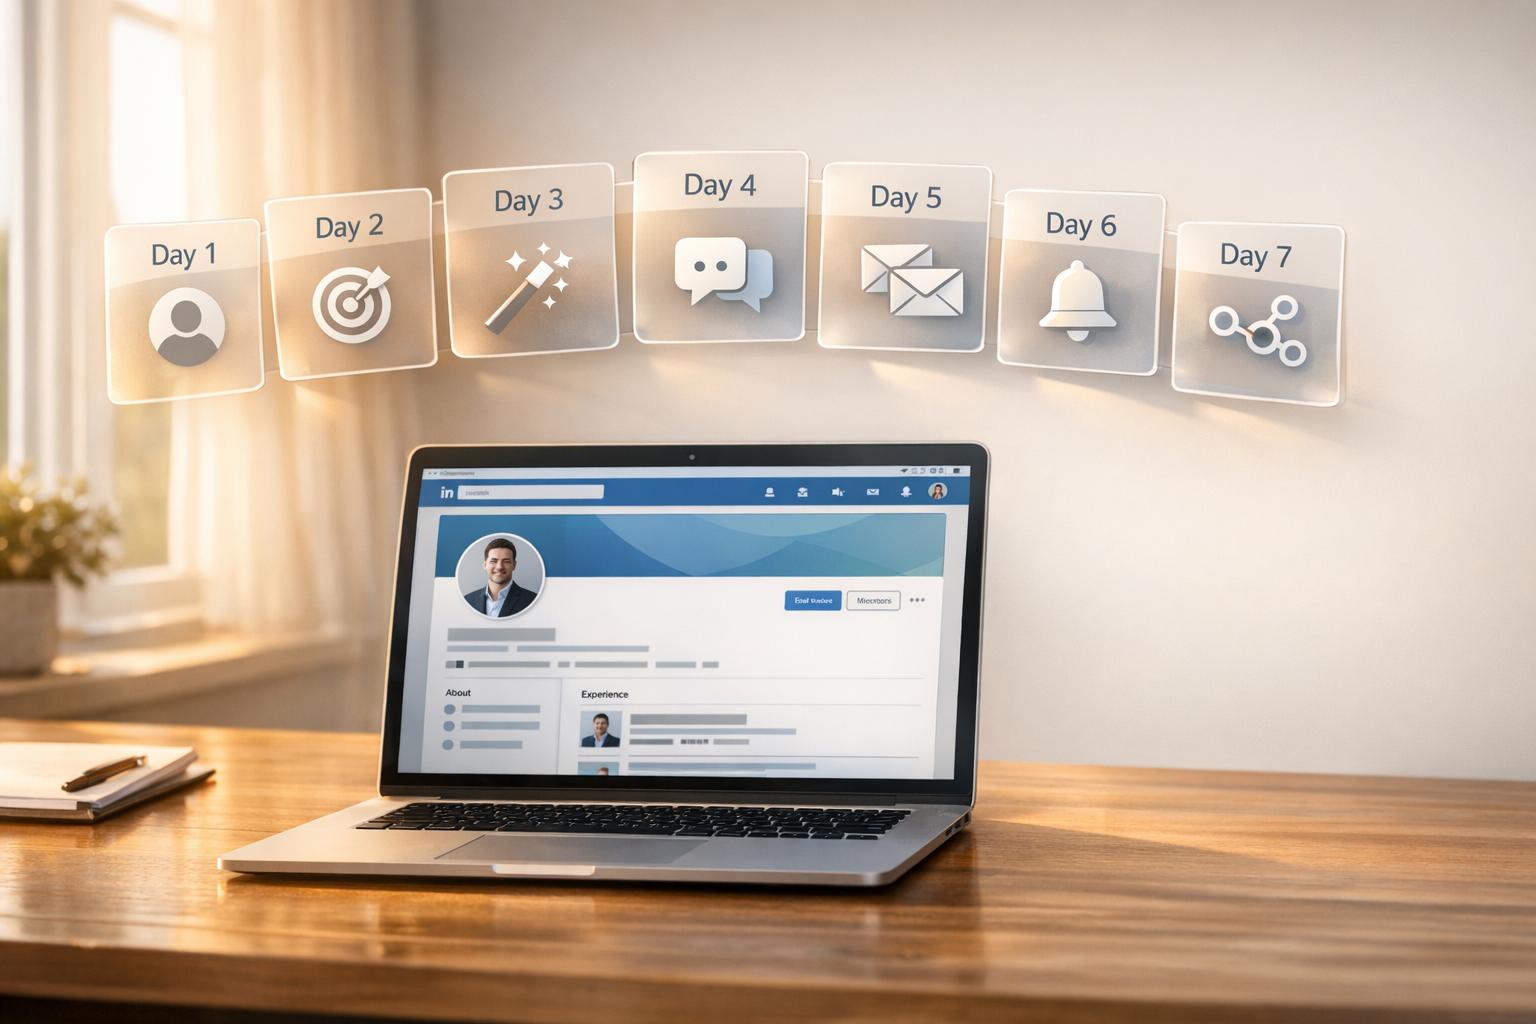
- Day 1: Set up your Closely account and improve your LinkedIn profile.
- Day 2: Define your target audience and enrich lead data.
- Day 3: Write personalized connection requests and follow-up messages.
- Day 4: Launch your first LinkedIn automation campaign.
- Day 5: Add email outreach and manage responses.
- Day 6: Analyze campaign performance and refine your approach.
- Day 7: Scale your efforts with team features and CRM integrations.
With features like AI-driven personalization, data enrichment, and multi-channel outreach, Closely helps users boost engagement by up to 52% and save 10–15 hours per week. Whether you’re an entrepreneur or part of a sales team, this approach simplifies lead generation and helps you focus on closing deals.

7-Day LinkedIn Automation Setup Guide for Lead Generation
Day 1: Set Up Your Closely Account and LinkedIn Profile

Create and Configure Your Closely Account
Getting started with Closely is quick and straightforward. Head to the Closely website, click on "Start Free Trial", and follow the prompts to enter your email, create a password, and verify your account via the confirmation link. During onboarding, select lead generation as your main goal to ensure the platform aligns with your needs.
Once your trial wraps up, you can opt for the Starter plan at $49 per month. This plan includes 1,000 monthly credits, cloud-based automation, and basic AI-driven message personalization. Closely uses dedicated residential proxies and randomized delays to keep your account safe. Fine-tune your safety settings by:
- Setting daily limits (e.g., 50–100 connection requests, 200 profile views).
- Enabling randomized delays (5–30 minutes).
- Activating the warm-up mode, starting at 20% activity and gradually increasing.
With your account configured and safety measures in place, you’re ready to focus on enhancing your LinkedIn profile.
Improve Your LinkedIn Profile to Attract Leads
Your LinkedIn profile is more than just a digital resume – it’s the first impression for prospects who receive your connection requests. Treat it like a landing page designed to convert visitors into leads. Here’s how to make it stand out:
- Craft a Headline That Speaks to Your Audience
Go beyond your job title by showcasing your value and expertise. For example:
"Helping B2B SaaS Founders Generate 50+ Qualified Leads/mo via LinkedIn | Automation Expert | DM for Free Audit."
Headlines like this can increase your profile’s visibility by up to 40% [5]. - Use a High-Quality Profile Photo
A professional headshot can make a huge difference. Profiles with high-quality photos get up to 21x more views and 36x more messages [5]. Use a high-resolution image (at least 400×400 pixels) with your face taking up 60% of the frame. Keep it simple: natural lighting, a plain background, business attire, and a confident smile. - Highlight Achievements in Your Experience Section
Focus on measurable results and use strong action verbs for each bullet point. For instance:- "Grew LinkedIn leads by 300% for over 50 clients, generating a $500,000 pipeline."
- "Closed $1 million in deals through personalized outreach."
Stick to 3–5 key accomplishments per role to keep it concise and impactful.
- Write an Engaging About Section
Start with a hook that addresses a common pain point. For example:
"Struggling with cold leads? I automate LinkedIn to deliver 20+ meetings per week."
Follow this with your credentials (e.g., "10+ years in sales, 5,000+ connections generated") and clearly outline your value offer. End with a strong call to action, such as:
"Connect and message me with your biggest challenge."
Keep this section under 2,600 characters to ensure it’s easy to read, even on mobile devices.
sbb-itb-8725941
Day 2: Define Your Target Audience and Enrich Lead Data
Build Your Ideal Customer Profile
To effectively connect with prospects, start by crafting an Ideal Customer Profile (ICP). An ICP outlines the type of organization that benefits most from your product while also being a valuable customer for your business. This blueprint ensures your sales, marketing, and product teams are on the same page, enabling you to tailor your messaging to address the specific needs and goals of decision-makers.
When building your ICP, focus on 5–10 key attributes. These might include company size, industry, annual revenue, funding status, location, and technologies they use. For more precise targeting, consider lead-level details like job titles, seniority, years in their current role, and even their group memberships. Tools like Closely can help streamline this process by extracting targeted leads directly from LinkedIn Search, Sales Navigator, Recruiter, LinkedIn Posts, Groups, or even uploaded CSV files. For instance, Sales Navigator filters such as "Posted on LinkedIn" can identify active users, while "Years in current company" might highlight prospects who are open to exploring new solutions.
A well-defined ICP is the foundation for successful data enrichment, ensuring your outreach efforts reach the right people.
Use Closely’s Data Enrichment Features
With your ICP in place, elevate your prospecting by enriching lead data with verified contact details. Closely makes this simple: head to the Enrichment tab, name your workflow, and upload a CSV file containing LinkedIn profile URLs. Start by selecting "Get real-time data from LinkedIn", which pulls essential information like names, job titles, company size, industry, and tech stack.
Closely’s Waterfall enrichment process dives into over 30 data sources to retrieve verified work emails and phone numbers, boasting a match rate of over 95% for B2B leads. You can also enhance your workflow with an optional AI Lead Scoring feature, which ranks prospects based on their likelihood to convert. To ensure accuracy, test the process using the "Run for the 1st row only" option before processing your entire list. Once enriched, export the data to a CSV file, Google Docs, or sync it directly with CRMs like HubSpot, Pipedrive, or Salesforce.
Your monthly allowance of 1,000 credits can be used for 250 emails, 50 phone numbers, or 500 AI personalizations. This makes it easy to focus on the leads with the highest potential value.
Day 3: Create AI-Powered Personalized Messages
Write Connection Requests and Messages That Work
Now that your profile is polished and your leads are ready, it’s time to focus on crafting messages that actually get responses. Forget those generic, copy-paste templates – they’ll tank your acceptance rates before you even start. Instead, aim to create messages that feel authentic and spark genuine interest. For connection requests, keep it under 300 characters, and for follow-ups, make sure they’re thoughtful and engaging.
A good connection request references something specific about the person. For instance: "Hi Sarah, loved your post on AI in sales – let’s connect." This personal touch can increase acceptance rates by 30–50% compared to generic messages. The key? Keep it short, relevant, and focused on them, not on what you’re selling.
Once your request is accepted, shift gears to providing value. A follow-up like this works well: "Thanks for connecting, Mark! I noticed you’re focused on customer retention at Acme Corp. Here’s a resource on reducing churn – thoughts?" The idea is to ask questions and share something useful, not to push your product. As Alina Fesenko, Content Creator at Closely, advises:
"You can’t push your product in the very first message (if you value your time)."
Be concise – stick to under 100 words for follow-ups. Avoid overloading your message with emojis or diving straight into a hard sales pitch. Instead, strike a balance between personalization and natural conversation. Use 2–3 specific details about the person, like their job title, a recent company milestone, or a shared interest, but integrate these naturally into your message.
To make this process easier, AI tools can help you personalize at scale.
Leverage AI for Personalized Messaging
Closely’s AI Sales Agents can take the heavy lifting out of personalization by automatically researching leads. The AI gathers insights from LinkedIn and company data, such as the prospect’s role, industry trends, or company updates, to craft messages tailored to their situation.
Here’s how you can use it: Go to the campaign builder and enable AI personalization. Insert dynamic variables like {firstName}, {jobTitle}, {companyName}, {location}, and {industry} into your templates. The AI will automatically fill these fields with accurate details for each contact. If you’re on the Starter plan, you get 500 AI personalizations per month, using your 1,000 monthly credits (each personalization costs 2 credits). This setup lets you scale outreach while keeping messages personal.
Closely also offers A/B testing to help you experiment with different message versions and figure out which personalization elements drive better responses. For added control, you can enable human review to ensure the tone aligns with your brand. Users have reported a 35% boost in response rates when using Closely’s AI-driven personalization, with some teams seeing a 52% increase in LinkedIn engagement overall.
To make your campaigns even more effective, set them to pause automatically when a prospect replies. This way, you can jump in and continue the conversation manually through Closely’s Unified Inbox. You can also enhance your outreach by combining connection requests with automated profile visits, post likes, and skill endorsements. This multi-touch strategy helps warm up prospects, making them more likely to engage when your message lands.
Day 4: Launch Your First LinkedIn Automation Campaign
Configure Your Campaign Settings
Now that you’ve crafted your optimized messages from Day 3, it’s time to set up your campaign to connect with your ideal leads. Using the Closely dashboard, you can launch your campaign effortlessly. Import your leads directly from LinkedIn Search, export leads from Sales Navigator, or even through a CSV upload [1].
Next, design a multi-step outreach sequence. Closely allows you to create personalized flows that include actions like profile visits, connection requests, follow-up messages, and post likes [1]. For example, your sequence might look like this:
- Day 1: Visit their profile
- Day 2: Send a connection request
- Day 4: If they accept, send a follow-up message
- Day 7: Share a helpful resource
This staggered approach mirrors natural behavior, making your outreach feel more authentic and conversational.
Don’t forget to enable the "auto-pause on replies" feature in your campaign settings [16, 3]. This ensures that automated follow-ups stop as soon as a lead responds, keeping interactions personal. Additionally, connect your CRM to sync all LinkedIn activity – like connections, messages, and replies – directly to your contact timelines [7].
Once your campaign is set up, focus on ensuring its safe and compliant operation.
Keep Your Campaign Safe and Compliant
Before hitting "launch", double-check that your campaign settings align with LinkedIn’s guidelines. Closely is designed with built-in safety features to help you avoid detection. For example, activate Warm-up Mode, which gradually increases your activity to build trust with LinkedIn’s system – especially useful if you’re new to automation or working with a fresh account [5, 4].
Set conservative daily limits for connection requests. While some users push boundaries, staying within 15–25 requests per day is a safer bet for long-term account health [10]. Closely incorporates researched daily caps and timed delays that mimic real user behavior, keeping your actions natural [3]. Plus, it operates using dedicated residential proxies, ensuring your activity appears consistent and localized, reducing the chance of triggering LinkedIn’s spam filters [5, 4].
Since Closely runs on the cloud, your campaign operates 24/7 without needing your device to stay online [3]. By following these safety measures, you can streamline your outreach while staying compliant. Many users report saving 10 to 15 hours each week on manual prospecting and achieving a 35% boost in response rates [3, 5].
Day 5: Add Email Outreach and Manage Responses
Set Up Email Outreach in Closely
By Day 5, your LinkedIn campaign should be running smoothly, so it’s time to expand your efforts by incorporating email outreach. Closely simplifies this process by allowing you to connect unlimited email accounts (Gmail or Outlook) directly to your dashboard – no complicated setup required [11]. Just head to the Email Accounts section in Settings, click "Add Email Account", and authenticate using OAuth. Once connected, you can create multichannel sequences that seamlessly combine LinkedIn actions with email follow-ups in multi-channel outreach sequences [11][2].
Why combine LinkedIn and email? It’s simple: doing so can double your reply rates and increase engagement by 70% [11]. For example, if a prospect accepts your LinkedIn connection request, Closely can automatically send them an email three days later, perhaps sharing a relevant resource or case study. Closely’s LinkedIn email finder helps you locate verified business emails from profiles, ensuring that your messages reach the right audience [2][3].
Before launching, make sure to configure your email safety settings. Enable Closely’s auto-warmup feature to gradually increase email volume, set daily sending limits (50–100 emails) to avoid spam triggers, and verify that SPF/DKIM authentication is properly set up for your domain [9]. Don’t forget to include unsubscribe links to comply with CAN-SPAM regulations. These precautions work alongside LinkedIn safety measures to maintain high deliverability and account security.
Once your email outreach is live, you can manage responses effortlessly with Closely’s Unified Inbox.
Track Replies Using the Unified Inbox
With your multichannel campaign up and running, Closely’s Unified Inbox makes managing replies a breeze. This centralized tool gathers all responses – whether from LinkedIn DMs, InMails, or emails – into one place, eliminating the need to constantly toggle between apps [2][4]. When a prospect replies, Closely automatically pauses their campaign, giving you the chance to take over the conversation manually [8].
To stay organized, tag conversations with labels like "Hot", "Meeting Booked", or "Follow-up Later" to prioritize high-value leads [8][4]. Add internal notes to keep track of key details, and assign conversations to specific team members. Closely even shows "teammate presence" indicators, so two people don’t accidentally respond to the same lead [2][4]. Users have reported saving 10 to 15 hours per week on manual prospecting and seeing a 35% boost in response rates thanks to this streamlined approach [2][3][4].
You can also monitor key campaign metrics directly in the dashboard, such as reply rates (aim for 15–25% for multichannel outreach), email open rates (40% or higher is a good target), and LinkedIn connection acceptance rates (20–30%) [6][9]. Sync all activity with your CRM – like HubSpot, Salesforce, or Pipedrive – to keep every interaction logged for accurate reporting [2][4]. For best results, reply to prospects within 24 hours to maintain momentum, and use Closely’s library of templates to speed up responses to common inquiries [8].
Day 6: Analyze Campaign Performance and Improve Results
Use Closely’s Campaign Analytics
Dive into your campaign data with Closely’s analytics tools. These provide a detailed look at individual campaigns, sequences, and your entire team’s outreach performance[4]. Head to the Analytics section in your dashboard to access real-time metrics that show how prospects are interacting with your efforts.
Keep an eye on key engagement stats like connection acceptance rates (aim for 20–30%), reply rates for Direct Messages and InMails (target 15–25% for multichannel campaigns), and end results like meetings booked and pipeline contributions. Closely also tracks responses from initial outreach versus follow-ups, helping you identify which touchpoints are driving the most impact. Running multiple campaigns? Use the platform’s A/B testing feature to compare message variations and see what resonates with your audience. You can even evaluate team performance, spotting top performers and sharing their strategies. Best of all, this data syncs seamlessly with CRMs like HubSpot, Salesforce, and Pipedrive, ensuring clean attribution and accurate forecasting[4].
These insights are your roadmap for making smarter, more efficient outreach adjustments.
Refine Your Outreach Based on Data
Once you’ve reviewed your analytics, it’s time to tweak your approach. If your positive reply rate is below 15%, try experimenting with different message hooks or value propositions – like testing casual versus formal tones. If you’re seeing high connection acceptance rates but fewer meetings booked, adjust your follow-up timing (e.g., try a 2-day gap instead of 5) or refine your targeting filters to better match your Ideal Customer Profile, focusing on factors like industry or job title.
Consider testing new calls-to-action too. Instead of immediately requesting a Zoom call, you could offer to share a resource or suggest a follow-up email. Experiment with content formats – compare plain text messages to hyper-personalized visuals like GIFs or images – to see what gets the best response.
Pay close attention to the tone of replies. If someone seems interested, act quickly to schedule a demo. For hesitant prospects, offer a case study or address their specific concerns. If they say "not interested", respond respectfully and share a helpful resource with no strings attached – this keeps the relationship open for future opportunities. By consistently testing and refining your outreach strategy based on Closely’s analytics, you’ll see steady improvements and get the most out of your campaigns.
Day 7: Scale Your Efforts with Team Features and CRM Integrations
Use Closely’s Team Management Tools
Once you’ve nailed the basics, it’s time to step things up. Upgrading to the Growth plan allows you to manage three LinkedIn accounts from one dashboard. That’s a game-changer for your outreach, essentially tripling your weekly efforts [12]. Plus, the Unified Team Inbox makes collaboration a breeze by centralizing team communication. You can assign leads using shared tags and rely on teammate presence indicators to avoid doubling up on outreach [7].
Remember the analytics insights from Day 6? The team dashboard takes it further by letting you compare connection acceptance and reply rates across team members. This helps you identify top performers and share their messaging strategies with the rest of the team. The result? Each member can save 10 hours per week on manual prospecting while teams see a 45% boost in pipeline opportunities [7].
With your team working in sync, it’s time to connect your outreach efforts to your CRM for a more unified sales process.
Integrate Closely with Your CRM and Other Tools
Team management is just one part of the equation. Integrating Closely with your CRM takes automation and data management to the next level. By automatically storing LinkedIn leads in your CRM, you get a complete view of your sales pipeline without lifting a finger.
Closely works with popular CRMs like HubSpot, Salesforce, Pipedrive, and GoHighLevel. It automatically syncs LinkedIn touchpoints – connection events, messages, and replies – keeping your sales data up to date. You can even set up workflows triggered by LinkedIn activity. For example, when a prospect accepts your connection, your CRM could launch a nurture sequence or notify your team.
Want to go deeper? Enable webhooks to connect with external tools for even more advanced integrations. Just don’t forget to test the setup with a sample lead to ensure everything maps correctly in your CRM before going live.
How To Get Clients with LinkedIn Automation Tools
Conclusion
This seven-day roadmap lays out everything you need to automate LinkedIn outreach and start generating leads. From setting up your Closely account on Day 1 to leveraging team features and CRM integrations by Day 7, each step builds toward a fully automated B2B funnel – one that requires virtually no manual effort [1].
Closely takes care of the heavy lifting with AI-driven personalization and real-time data enrichment. Its AI Sales Agents analyze each lead’s profile and company website to create messages that feel natural and conversational. Meanwhile, dedicated residential proxies ensure your account remains secure [1][2].
The numbers speak for themselves. Users report a 52% higher engagement rate on LinkedIn, save an average of 15 hours per week on manual tasks, and make three times more connections with qualified decision-makers [1]. Digital Strategist & Coach Antonio D. highlights the platform’s ease of use:
"Closely is a powerful tool for anyone looking to enhance their sales engagement. The platform is user-friendly and easy to navigate, making it accessible even for those who are not tech-savvy." [1]
Whether you’re an individual using the Starter plan at $49/month or managing multiple accounts with the Growth plan, Closely equips you with everything needed to turn LinkedIn into a reliable lead generation engine. Features like the unified inbox keep conversations organized, CRM integrations sync your data effortlessly, and the warm-up mode ensures account safety as you scale.
Start your journey today – kick off on Day 1 and see your automated campaign deliver results in just one week.
FAQs
Will LinkedIn automation get my account restricted?
LinkedIn automation can be risky if not handled carefully, potentially leading to account restrictions. To avoid problems, stick to LinkedIn’s guidelines and maintain a steady, reasonable activity level – like sending 20-30 connection requests per day. Avoid sudden increases in activity or anything that could come across as spam.
Focus on personalizing your outreach and gradually increasing your activity over time. Using automation tools responsibly and within safe limits is crucial for protecting your account. Following LinkedIn’s rules is the best way to ensure your account stays secure.
What daily LinkedIn limits should I use as a beginner?
As someone new to LinkedIn automation, it’s best to start small and stay cautious. Aim for 20-30 connection requests per day and keep your messaging to 50-100 messages daily. On a weekly basis, limit connection requests to 100-200 to stay on the safe side.
To make your activity appear natural, spread it out during the day. Sending 2-3 connection requests in short bursts can help mimic how a real user might behave. Over time, you can slowly adjust these limits, but always keep an eye on your account activity to avoid triggering any restrictions.
When should I add email outreach to my LinkedIn campaign?
You should include email outreach as part of your LinkedIn campaign after you’ve built some initial connections and engagement on the platform. Once you’ve established rapport or started seeing results from your LinkedIn efforts, adding email to your strategy can take things further. This multi-channel approach not only boosts your chances of converting leads but also helps you stay within LinkedIn’s activity limits, reducing the risk of hitting restrictions.